- The Substance Integration
- Substance Palette
- Drag and Drop
- Texture Resolution
- Settings
- Channels
- Properties
- Preview Area
- Render Buttons & Render Modes
- Image Manager Integration
- Substances inside the Image Manager
- Editing a Substance from the Image Manager
- Image Manager looks different ?
- Customizing the Substance Image Manager Preview
- Nodegraph Integration
- "Edit Substance" Node Context Menu
- "Edit Substance" Right Mouse click Menu
- "Edit Substance" from Nodegraph Dock
- "Substance Attributes" inside the Graph Properties
- From the Substance Palette
- Layerstack Integration
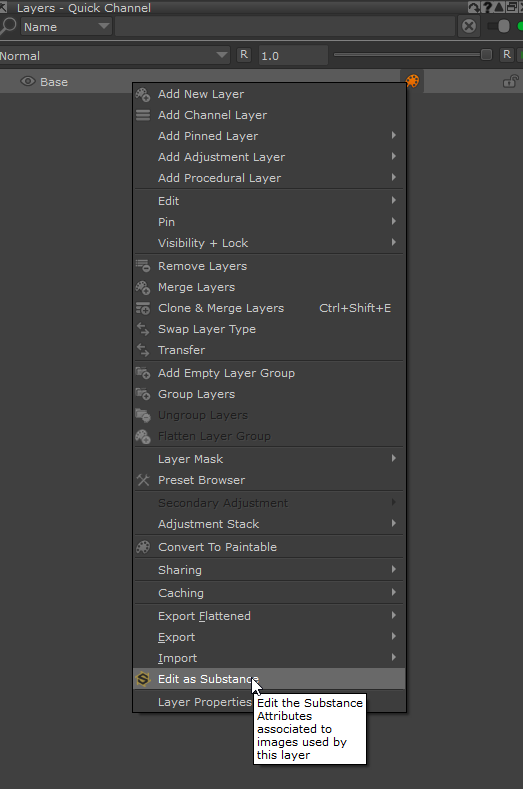
- "Edit Substance" in Layers
Substance support in Mari spans multiple sections.
•The Substance Palette - the heart of where you load and control Substance Files
•The Image Manager where Substance Files are loaded into in the form of Image Groups
•"Edit as Substance" Actions found in Image Manager, Nodegraph and Layerstack
The Substance Palette is the main place to load and edit Substance .sbsar files
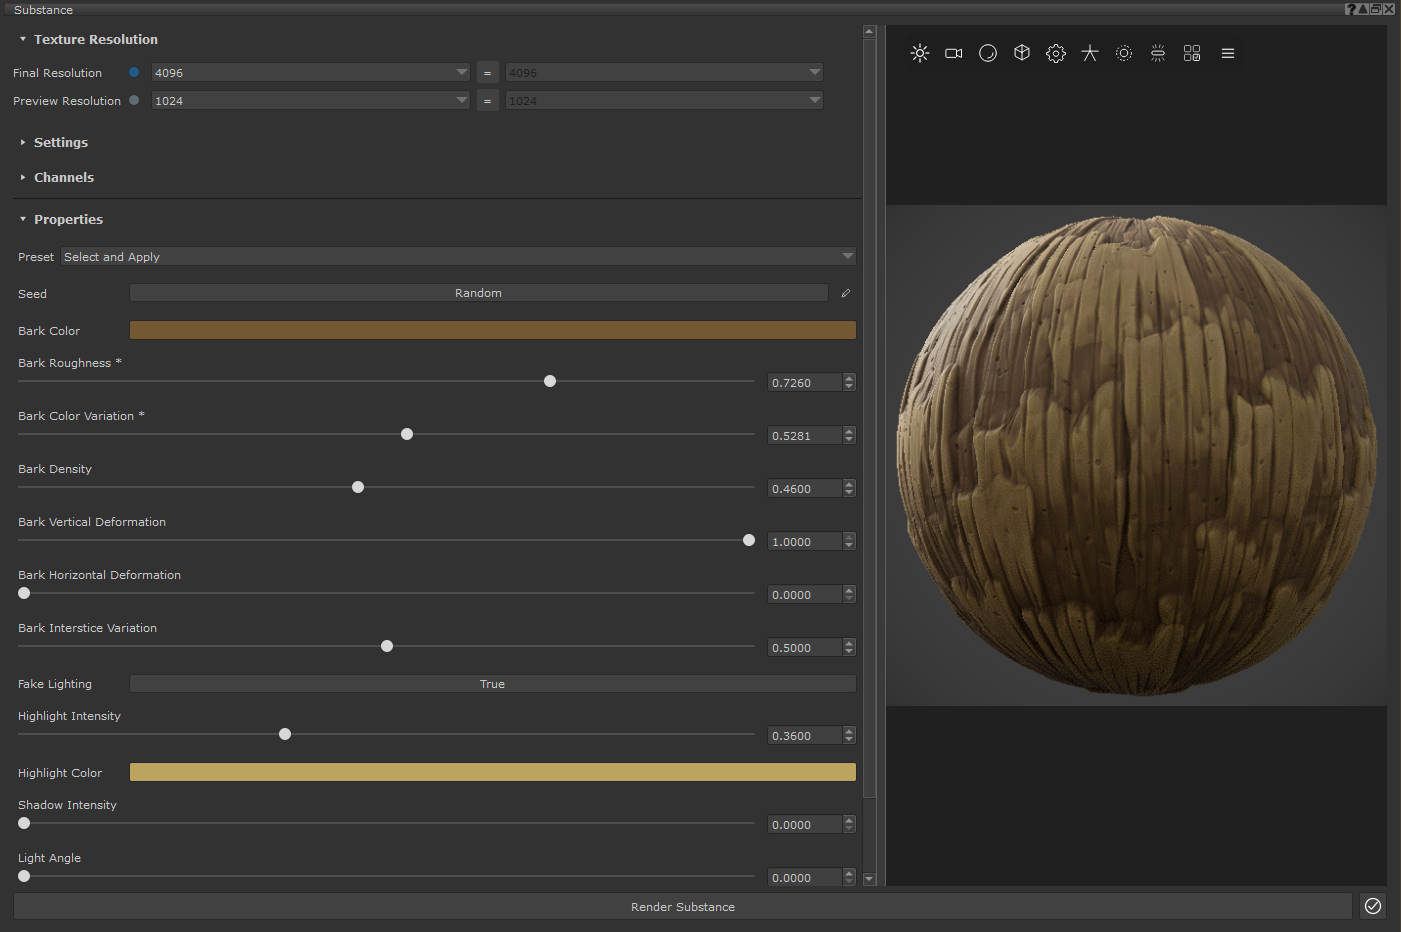
You can open it from Mari's Palette sidebar

It consists of the following areas:
The Substance Palette is fully drag & drop aware of .sbsar files.


The Texture Resolution Group controls the resolution of the different channels of the substance and how they get imported into Mari's Image Manager
•The "Final Resolution" is your desired Texture Resolution. Think of it like your "Export Resolution" in Substance 3D Painter.
•The "Preview Resolution" is an intermediate resolution that is used to provide a quick preview at a lower resolution while the highres version renders.
Preview resolutions are for example created while holding and moving a slider to give direct feedback inside Mari.
Think of it like your "Document Resolution" in Substance 3D Painter.

You can spot which process is currently rendering based on the differently colored progress bar at the bottom of the palette, matching the color label of the Final/Preview Resolution

Since Substance Files are often fully procedural, they may react differently based on their Render Resolution.
Below you can see the exact same substance file with same settings - rendered once at 512x512 px and once at 4096x4096px - generating radically different results
If the "preview" look and "final resolution" look differ too much to be of any use, increase the preview resolution to be closer to the final render resolution.
You will sacrifice some speed but will end up with a closer result in the preview phase to your final.
|
|
|
Setting the Preview Resolution to the same value as the Final Resolution (or higher) turns the preview step off. Everything then renders at Final Resolution only. |
|
While by default most substances will generate square images, you can override the aspect ratio by unlocking the separate X/Y Resolutions:
resulting in non-square images being generated:
|
|
|
Final Render Resolutions can be overwritten on a per channel level (Base Color, Displacement etc. ) using the Channels section of the Substance Palette |
|
The "Settings" container of the Palette houses, options to control the rendered Substance Graph, Variants of the same substance as well as Render Behaviors.
For an in-depth explanation please refer to the dedicated Settings Page

•SBSAR Path
The path of the currently loaded .sbsar file. You can browse here for a new file
|
|
|
The sbsar file is cached into Mari's Project, meaning that even if the original path no longer exists you will be able to edit the substance file. |
|

•Graph
Some .sbsar files may contain different graphs - each one with its own output. The Graph Dropdown let's you choose which graph to render
Changing your Graph will update the "Channels" Section with the Graph specific outputs.
•Material Variants

The "Material Variants" section of the Settings controls the link of the loaded Substance File to the files imported in Mari.The Current Variant refers to the Substance Image Group in the Image Manager the currently loaded Substance is linked to.
Creating a New Variant will disconnect from the old Image Group and create a new one, with the same settings as are currently in the Substance Palette. This allows you to create variations of the same substance for use in e.g. different materials.
The Image Folder refers to the Image Manager Folder organization and defines where the Substance Palette will place the rendered Substance

•Colors

The "Use Mari Color Picker" Option determines in which dialog you will change colors of substance attributes
By default it will use a standard sRGB Color Picker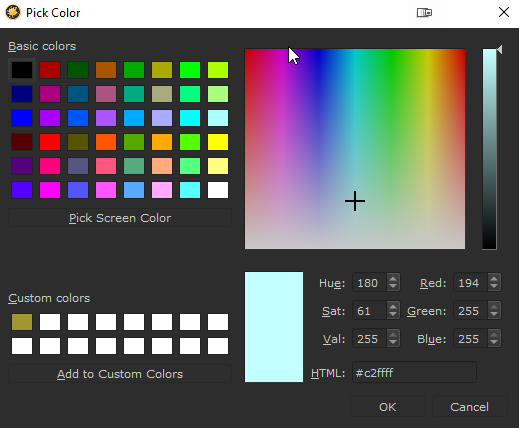
If "Use Mari Color Picker" is ticked, the Mari Color Picker will be used

|
|
|
The standard color picker will show a live preview of the updated color while it is open. The Mari Color picker doesn't. |
|
•Render Behaviors
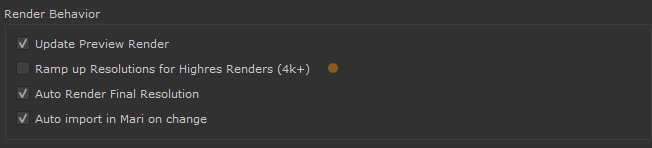
The Render Behavior section allows you to fine tune what happens during a Substance Render.
|
|
|
|
|

○Update Preview Render
While on the Substance Preview Widget will update to reflect settings changes
○Ramp up Resolutions for Highres Renders (4k+)
While on final render resolutions of 4k and above are rendered staggered.
E.g. with a final Resolution render of 8k, and a 512 preview resolution, it renders - 512 > 4k > 8k so you see updates overall faster in the Mari Viewport.
It costs more total render time than rendering the target once, but gives faster perceived feedback while iterating.
○Auto Render Final Resolution
When on the Final Resolution render will auto-kick off once the Preview has finished.
If off, you need to manually render the Highres Resolution.
Turning this off can help with iterating on looks since you only pay the price of the lower res preview render
○Auto Import in Mari on change
When on and the currently loaded Substance in the Palette has a connection to a loaded substance inside Mari, updating substance settings will automatically update the instance used within Mari
•Suspend Engine
The Substance Integration launches a separate process from Mari called "mari_sbsar_bridge" to render substances (you can find it for example in your task manager).
The Suspend Engine Button will terminate this process, therefore freeing up the system resources allocated to that process
This is not usually necessary to do manually, as the Engine will auto-time out after 80 seconds of inactivity and boot up again as required.
|
|
|
When the Engine was suspended or timed-out, the first change after (e.g. a slider change) will be slower to preview as the Substance Engine needs to first load again |
|
The Channels section controls which channels of a Substance should be rendered, its Resolution, Depth and Colorspace.
It also gives a quick overview over any unused data the substance may generate - data that is not in use inside of Mari.
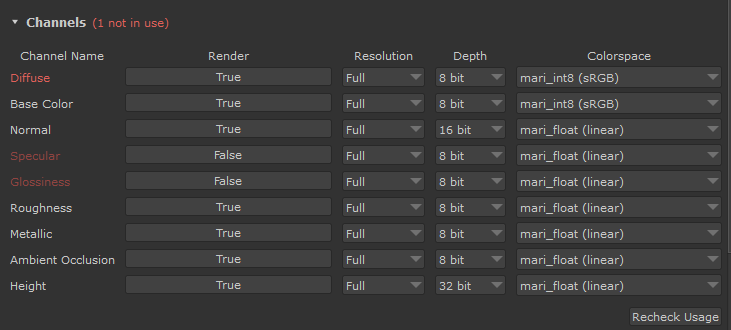
•Channel Names
On the left side you see all channels that the specific Substance Material contains.
Channels are "Substance Output Nodes" within a Substance Material Graph.
Changing the Graph in the Settings will also repopulate the Channels.
White channel names are rendered
Dark Red channel names are not rendered
Bright Red channel names are rendered but aren't in use in your scene.
The number of bright red channels (rendered but not in use) is displayed in the header of the section
Channels that are rendered but not actually in use (not in use inside a material, brush etc.) are essentially wasted rendertime and should be disabled
•Render
The "Render" Column determines which channel is being rendered and which should be ignored.
For example many substances come with both a "Diffuse" and "Base Color" channel -- essentially the same thing - so only one of those is usually required.
Your selection of channels marked for rendering is remembered and auto applied the next time you import a new substance
•Resolution
The resolution allows you to overwrite the Final Render Resolution on a per channel basis.
Available options are
○Full (100% Final Render Resolution)
○Half (50% Final Render Resolution)
○Quarter (25% Final Render Resolution)
•Depth
Allows you to set the Bitdepth the channel should be rendered in.
Your choice is remembered and auto applied the next time you import a new substance
•Colorspace
Allows you to set the colorspace the channel should be imported in
Your choice is remembered and auto applied the next time you import a new substance

The Substance Properties section is dynamically generated based on the parameters the chosen .sbsar file exposes - meaning it will look different depending on the loaded Substance.
The following workflows are supported for the Properties Section, regardless of the Substance
•You can generate variations of the same material by changing the Seed
To define a fixed seed value, click on the "Pen" Button to the right and enter a value
•A non-default value is marked with an * in its label. 
•Right mouse click the label to reset the value to default
•You can reset all values to default at the bottom of the properties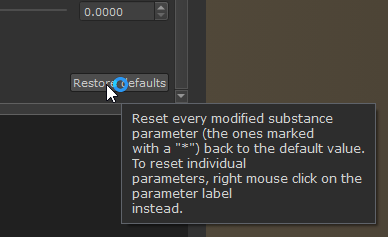
•When right mouse clicking on Sliders, the Extension Pack Increment Ladder is shown. Drag away from a button to change values at different increments
•Place your cursor inside a number field and press Arrow Key Up or down to modify the value to the right of the cursor

The Preview area gives you a visual preview of your substance applied to a standard shape (Sphere, Cylinder etc.).
You can navigate in the preview by:
○Left-drag: Rotate Camera
○Right-drag or wheel: Zoom Camera
○Middle Drag: Pan Camera
○Shift+Right Drag: Rotate Light
○Double Click: Reset Camera
You can adjust the size of the preview area via the splitter to be larger or smaller.
There are many options to customize the preview area, which we cover in the separate "Preview Area" Topic
Options to customize the Preview Area


The Render Button allow you to execute a Substance Render. The Button will behave differently and show different text, based on your chosen Render Behavior.
If the Button displays an animated gradient like below, it means a change is inside the Substance Palette that has not yet been brought into Mari

To the right of the Render Button are the Render Behavior Presets. Clicking the button cycles through different behaviors

|
Mode |
Name |
Explanation |
|
|
Fast |
Fast mode will turn off the "Auto Render Final Resolution" setting in the "Render Behaviors" Section of the Palette Settings. The Button at the bottom of the Palette will change to "Render Substance (Final Resolution)". An animated gradient on the button will indicate if there's a change to render |
|
|
Full Auto |
Full auto will activate "Auto Render Final Resolution" and "Auto Import into Mari on change" in the "Render Behaviors" Section of the Palette Settings. |
|
|
Manual |
Manual mode will turn on "Auto Render Final Resolution" but turn off "Auto Import into Mari on change" in the "Render Behaviors" Section of the Palette Settings. |
|
|
User |
User mode will restore the settings combinations you have manually set in "Render Behaviors" Section of the Palette Settings. |






|
|
|
For detailed examples of different render modes refer to the dedicated "Substance Render Modes" Section of this documentation |
|
Imported Substances live inside Mari's Image Manager
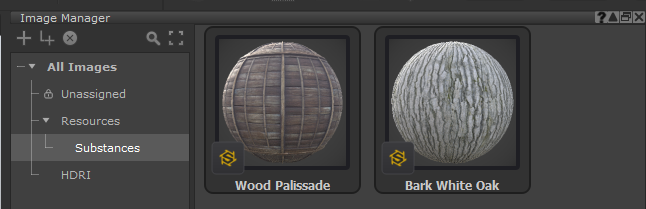
Substance Materials are treated as regular image imports that live inside Mari's Image Manager, though they are grouped. You can double click a group to expand it and see its images
Example of images inside a Substance Material Group in the Image Manager
Substance Materials can be identified via a "S" Button in the lower left corner 
By default the Substance Palette will place Substance Materials inside the Folder /Resources/Substances. This can be changed in the "Settings / Material Variants" Section of Substances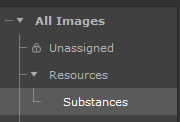
To edit a Substance directly from the Image Manager, click the "S" Button on a Substance Image Group. This will open the Substance inside the Substance Palette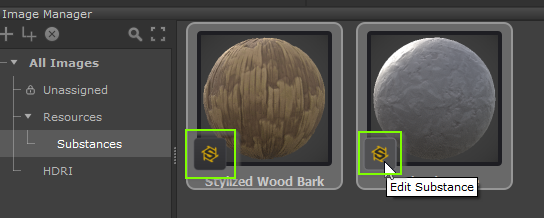
Alternatively you can right mouse click and choose "Edit as Substance"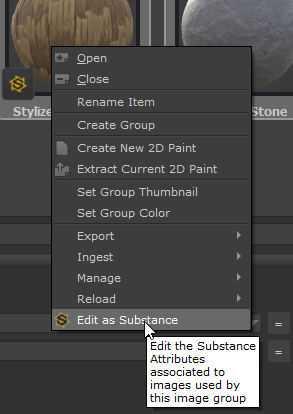
The Image Manager "Edit Substance" Actions are the same as right mouse clicking into the Substance Palette and choosing "Load Substance from Image Manager Selection"
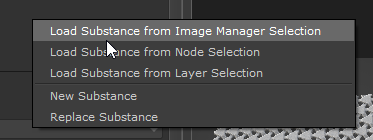
If your image manager doesn't show Substance Previews or you don't see the Folders, check inside the Mari Preferences.
•Go to the /Edit Menu
•Choose "Preferences"
•Go to the "Misc" Tab
•Scroll down to the "UI Style" Section and ensure "Image Manager" is set to "Extension Pack"
By default the Image Manager Preview of Substance Materials will use a Material Ball with fixed Settings for Tiling, Displacement Strength etc. 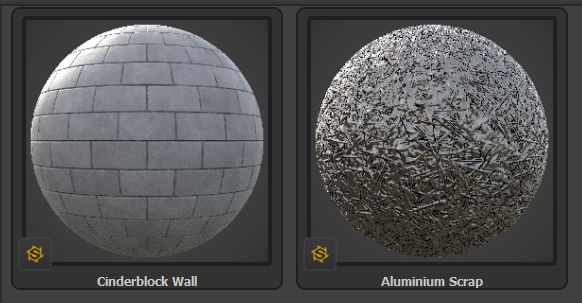
You can customize these to your personal preference or define a team wide environment variable to roll out standardized looks.
Please refer to "Customizing Previews" for more information
Example of a different Image Manager Preview Style for Substance Materials
When using a Substance inside a Node in the Nodegraph, there are a number of ways to quickly edit the Parameters of a Substance Select the node that uses a Substance Image and press CTRL+SPACE. Select the node that uses a Substance Image and right mouse click. Select the node that uses a Substance Image and click the "S" Button inside the Nodegraph Dock. This will edit the associated Substance inside the Substance Palette A convenient way when working with the Nodegraph is to use the graph properties panel, which supports editing Substance Attributes as well. 1.To open the Panel click the "Properties" Button in the Nodegraph Title Bar 2.Select a Node with an associated Substance Image or Material and click the "Substance Attributes" Tab of the new Panel 3.Select a different Node with associated Substances and click "Substance Attributes" again to refresh the panel Select a Node with an associated Substance Image or Material. Inside the Substance Palette, right mouse click and choose "Load Substance from Node Selection" To edit a Layer that uses a Substance Image or Material, right mouse click the Layer and choose "Edit as Substance" from the Context Menu.
If the Node has a Node Context Menu defined and uses a Substance Image, a "Edit Substance" Button will be visible.
Click it to edit the associated Substance inside the Substance Palette
In the "Edit" Menu choose the "Edit as Substance" option