|
UI Overview |
- General
- 1 - The Gradient
- 2 - Global Gradient Controls
- 3 - Ramp Keys
- 4 - Sequence Eyedropper
- 5 - Top Row
- 6 - Button Row
- 7 - Presets
- 8 - Info and Warning Row

|
General |
All User Interface elements have Tooltips, explaining their functionality and listing any associated Hotkeys.
The editor has a full Undo / Redo system, which you can use via the Hotkeys Ctrl+Z (undo) and Ctrl+Y (redo).
Currently the Undo stack is limited to the 200 last items.
Sometimes "inbetween" steps such as selections might add 2 undo steps instead of one, in which case you might have to press undo multiple times
to get back to where you want to be.
Sliders and numerical Input Fields have adopted some convenience controls you might know from Foundry Nuke or SideFX Houdini.
For fine decimal control in a numerical Input field (e.g. Position Box or field next to sliders), place your cursor next to the number you want to control, then use the Arrow UP and Arrow Down keys to change the decimal to the right of the cursor.
Example of using Arrow up/down Hotkeys to control the decimal to the right of the cursor:


Sliders have additional control over the value increments a mouse move adds/subtracts. To access the precision ladder, right mouse click on a slider, then drag away from one of the available increments.

|
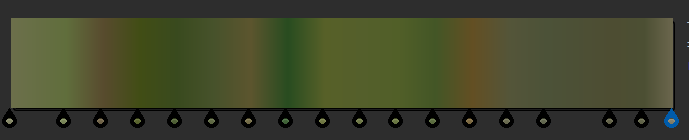
1 - The Gradient |

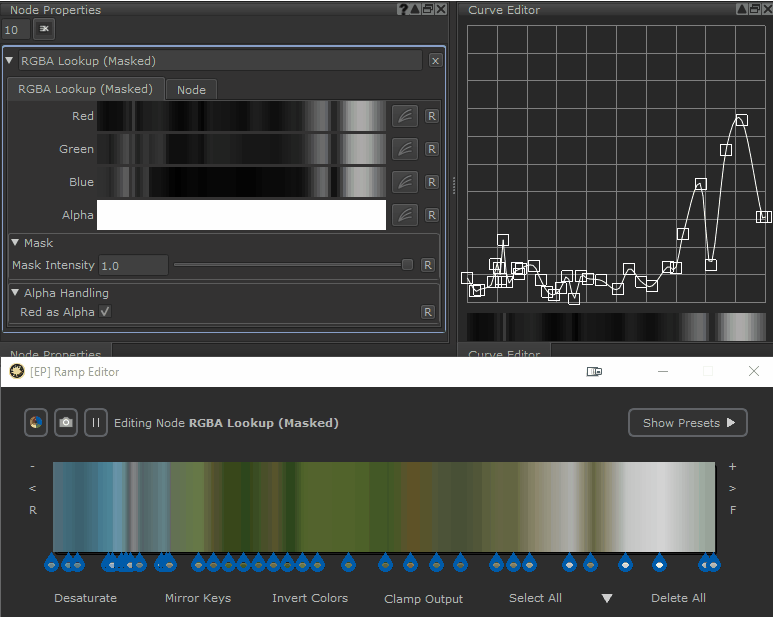
The Gradient is the main visual representation of the result of editing a curve node such as the "RGBA Lookup" Node.
Mari itself does not have a "Ramp" UI Element, so without Extension Pack you are usually left with editing Curves representing Red,Green, Blue and Alpha separately
without having a clear representation of the effect of them outside of the Viewport display.
Below you can see Mari's standard representation of separate Curves for Red, Green, Blue and Alpha Channel editing, with the red channel shown as a curve on the right.
Using the Ramp Editor you get immediate visual feedback and much more control to create complex curves. Below you can see the resulting curve for the red channel,
created after applying the ramp to the curve node.The Y coordinate of the curve corresponds to the color value of a channel (shown below is the red channel) in the Ramp Editor
while the X Coordinate of the Curve corresponds to the X (horizontal) Position of the color in the Ramp Editor
Making a change in the Ramp Editor live updates the Curves of the Node that was selected when opening the Ramp Editor
To add a new color key to the gradient, simply click at a position within in the Gradient

To remove a selected Gradient click the "X" Button or press Hotkey DEL.

To completely clear all Color keys press the "Delete All" Button below the Gradient

You have multiple ways to select keys - one or multiple. They involve a combination of Hotkeys (Ctrl, Shift) as well as click, double click and mouse drag actions.
To make a single key selection, simple left click on the key handle

To add to an existing selection hold the SHIFT Hotkey while clicking

To subtract from an existing selection hold the CTRL Hotkey while clicking

Instead of clicking on a key handle you can also use a rubber band selection to make selections. To do this, hold your left mouse button and drag below the handles
To add additional Rectangle Selections, hold the SHIFT Hotkey while dragging

To remove handles from the current selection, using a Rectangle Selection, hold the CTRL Hotkey while dragging

When you have a range of keys selected, and you want to reduce the current selection to just one of the already selected keys, double click the key handle or drag a new selection.


Some additional global selection options can be found below the gradient:
- Select All
Hotkey: Ctrl+A
Will select all keys in the Gradient.
- Deselect All
Hotkey: Ctrl+D
Will deselect all keys in the Gradient.
- Invert Selection
Hotkey: Ctrl+I
Selected Keys will become unselected, previously unselected keys will become selected
- Select Duplicate Positions
Will select any key in the gradient that shares exactly (to the decimal) the same position as another key.
Sometimes you might have keys occupying the same positions, causing unnatural gradients or hard steps.
Using this option you can quickly select and delete any overlapping key.
The easiest way to slide one or multiple selected keys is to drag the keys.
For finer control you can use the Position Entry Field

With a single key selected, you can enter the absolute position of the key in the gradient's 0-1 horizontal range.
With multiple keys selected you can add or subtract values from each key's position.
The Position Entry field can be controlled via manual number entries and using the plus and minus buttons.
For advanced controls place your cursor into the number field and use the Arrow Up and Arrow Down Hotkeys to control
the decimal to the right of the cursor
Example of using Arrow up/down Hotkeys to control the decimal to the right of the cursor:
You can scale selected keys up or down within the Gradient.
Scaling will keep the original relative positions of the keys to each other while increasing or reducing their overall range.
To scale keys, press and hold Hotkey Q then click and drag within the gradient to the left or right. The initial click position will become the Start Position,
and dragging the mouse to the right will incrementally scale the key positions up around the midpoint of all selected keys.
Dragging the mouse to the left will scale the keys down.
As long as the mouse button has not been released you can still change the increments by moving your mouse back or forth.
You can evenly distribute keys by pressing and holding Hotkey D, then click and drag to the right within the gradient.
Selected keys will start to evenly distribute inbetween the first and last selected keys.
While the mouse button is still pressed you can alaways return to a less evenly distributed version.
If no keys are selected or less than 3 keys are selected, the distribution will be performed between the first and last key in the gradient.
To make duplicates of selected keys, press and hold Hotkey U and slide within the gradient.
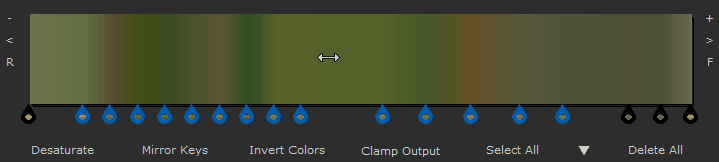
When working in very densely populated ramps or when needing pixel-perfect precision, you mind find that the default view of the Ramp is not precise enough.
To help with this, you can zoom into the ramp unlimited.
The buttons to the left and right of the gradient offer various zoom options
The Button Label corresponds with their assigned hotkeys.
- Zoom in/out
Hotkey: + / -
The + and - Buttons/Hotkeys allow you to zoom into the gradient step for step. Hold down the keys for more rapid zooming.
If no keys are selected, you will zoom towards position 0.
If keys are selected they will become the zoom target
- Pan left/right
Hotkey: Arrow Left / Arrow Right
Once zoomed in you can use the Arrow Right and Arrow Left Buttons/Hotkeys to pan around the gradient
- Reset Zoom
Hotkey: R
To reset the zoom to the default view (full 0 to 1 positions visibile), press the R Button/Hotkey
- Frame Selected Keys
Hotkey: F
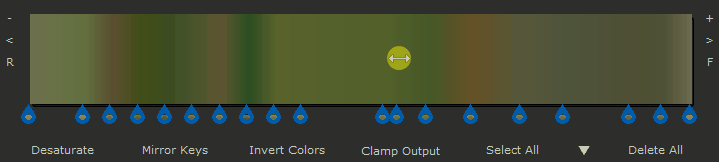
If you have keys selected press the F Button/Hotkey to instantly maximize the zoom to frame the selected keys.
The width of the gradient will encompass the selected keys on the far left and far right.
The Gradient Display as well as the Color field in the "Gradient Keys" Section go through a Lookup Table (LUT) to mimic color results in the Mari viewport.
|
|
The Gradient Lookup Tables do not affect internal data. It is only changing the display of color values within the Editor |
The Lookup Table mimics the Color/Scalar Lookups found in the View Transform Toolbar
Mari's View Transform Toolbar

A similar color/scalar toggle as in the View Transform Toolbar can be found in the Right hand corner of the Ramp Editor, allowing you to switch the display of colors in the Editor between color and scalar mode.

Optionally you can double click the toggle to set it to "Scene Link" Mode, where the Setting will automatically switch depending on which state the Mari View Transform Toolbar is in.
Below you can find the Icons representing the different modes
|
|
The Gradient Color Display goes through the Lookup Table chosen in the View Transform Toolbar for "Color" Mode |
|
|
The Gradient Color Display goes through the Lookup Table chosen in the View Transform Toolbar for "Scalar/Raw" Mode (often none or raw) |
|
|
The Gradient Color Display is synced to auto-switch depending in which state the View Transform Toolbar is in. |
|
|
The Gradient Color Display is synced to auto-switch depending in which state the View Transform Toolbar is in. |


For details on Colorspace and Lookup Tables refer to the Ramp Editor Colorspace Section.
|
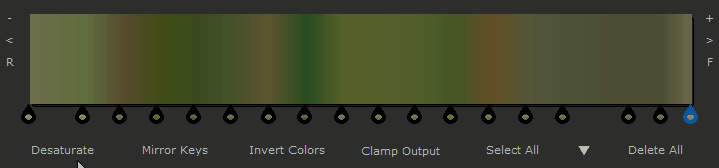
2 - Global Gradient Controls |

Below the Gradient you can find a number of Actions that always operate on the entire gradient
"Desaturate" will convert all colors of all keys in the Gradient to a Grayscale value, using a Bt.709 Luminance function.
To only desature selected keys, use the "To Gray" Button instead.

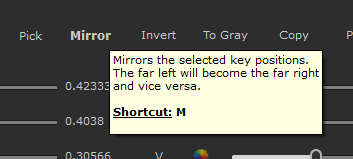
"Mirror" will flip the positions of the entire Gradient, e.g. position 0 will become position 1 and vice versa.
To only mirror selected keys use the "Mirror" Button in the "Ramp Keys" Section instead.

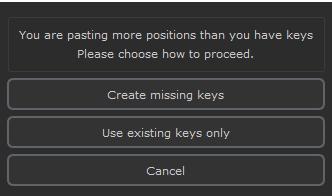
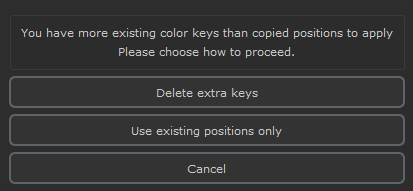
The "Copy/Paste Key Positions System is designed to help with matching Ramps in between different nodes.
- Copy Key Positions
Stores a list of all Key Positions to a file on disc
- Paste Key Positions
Loads a previously stored (copied) Key Position list from Disc and applies it to the current Ramp.
The Paste System has some advanced Logic to deal with differences in Key Amounts between the current Ramp and what was copied
|
Identical Number of copied Positions and Ramp Color Keys |
If the number of copied Color Key Positions matches the current amount of Keys in the Gradient, the positions are simply applied to the Color Keys from left to right |
|
Ramp Color Keys |
If the previously copied Ramp Positions, contain more keys/key positions than the current Ramp you will be prompted how to proceed
|
|
Ramp Color Keys |
If the previously copied Ramp Positions, contain more keys/key positions than the current Ramp you will be prompted how to proceed
|
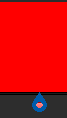
"Invert Colors" will convert all colors in the Gradient to their reversed color. Reversing is done by subtracting the value of each color channel from 1 e.g.
new_red.VALUE = 1.0 - red_channel.VALUE
new_green.VALUE = 1.0 - green_channel..VALUE
new_green.VALUE = 1.0 - green_channel..VALUE
The alpha will never be inverted.

If you wish to invert only selected handles, use the "Invert" button in the "Ramp Keys" Section instead.
"Clamp Output" will cut off any values in colors below 0 at 0.0 and any value above 1.0 at 1.0.
This only happens when the values are applied to the node. Within the Ramp editor, values will stay in their original range, so you can toggle the button on and off as required.
|
|
Mari's Curve Nodes clamp at 0 and 1 by default. Therefore the Clamp button will only have an effect when working on the Gradient Map Node |
The global Selection Options give you quick access to common selection ranges
- Select All
Hotkey: Ctrl+A
Will select all keys in the Gradient.
- Deselect All
Hotkey: Ctrl+D
Will deselect all keys in the Gradient.
- Invert Selection
Hotkey: Ctrl+I
Selected Keys will become unselected, previously unselected keys will become selected
- Select Duplicate Positions
Will select any key in the gradient that shares exactly (to the decimal) the same position as another key.
Sometimes you might have keys occupying the same positions, causing unnatural gradients or hard steps.
Using this option you can quickly select and delete any overlapping key.
All keys will be deleted from the gradient and you will get a black to white gradient
|
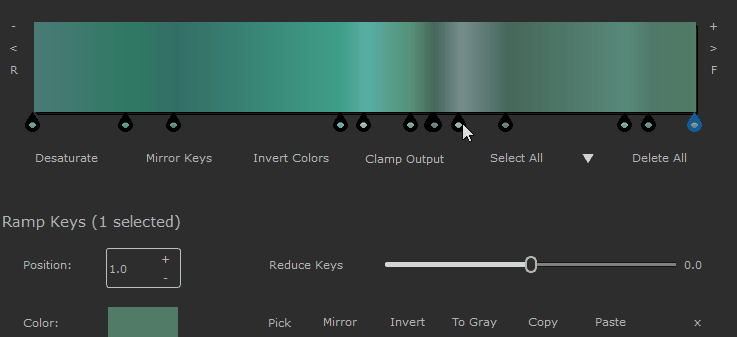
3 - Ramp Keys |
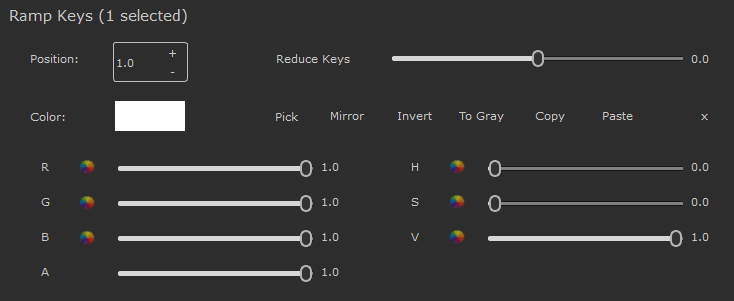
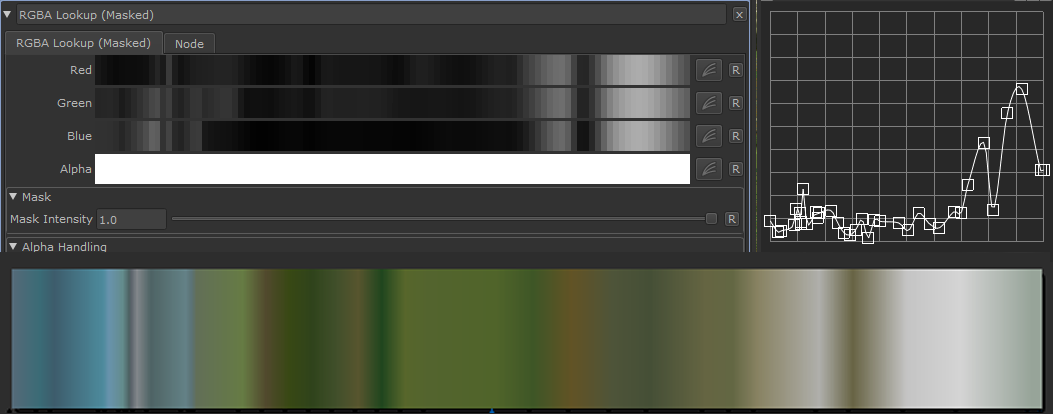
The "Ramp Keys" Section houses the majority of controls for the Gradient.
You can use it to interact with selected keys, change their color and position, or reduce the number of keys.
|
|
Interface and Behavior of Ramp Key UI Elements change depending on number of selected keys (1 vs multiples) |
For finer control of the position of a selected key in the gradient, you can use the Position Entry Field
With a single key selected, you can enter the absolute position of the key in the gradient's 0-1 horizontal range.
With multiple keys selected you can add or subtract values from each key's position.
The Position Entry field can be controlled via manual number entries and using the plus and minus buttons.
For advanced controls place your cursor into the number field and use the Arrow Up and Arrow Down Hotkeys to control
the decimal to the right of the cursor
Example of using Arrow up/down Hotkeys to control the decimal to the right of the cursor:

The "Reduce Keys" function will try to lessen the amount of keys, by removing ones that contribute less to the final result.
To achieve this, the algorithm compares a key's Color (Hue,Saturation and Value) to its direct neighbour and marks it for removal if the summed up differences are below the threshold set by the slider.
The direction you pull the slider (towards negative or positive values) determines the direction the gradient is evaluated in.
Positive slider values will evaluate the neighbor to the right of a key to check for similarities, negative values will evaluate the neighbor on the left.
Only once the slider is released are the keys deleted from the gradient.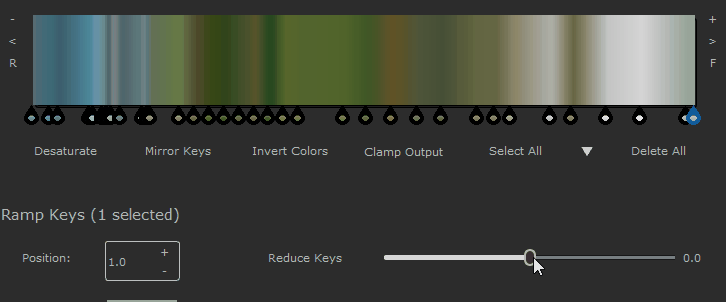

The Color Swatch allows you to choose a color for a selected key. It only works with a single key selected and the field is disabled when multiple keys are selected
Another way to directly pick a color with a single key selected, is to use the quick picker next to the color sliders
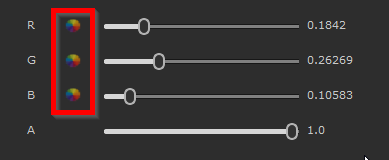

When multiple keys are selected, this Quick Picker will act as a Tint Modifier instead (see "Color Selection vs Tint Mode" Section below)
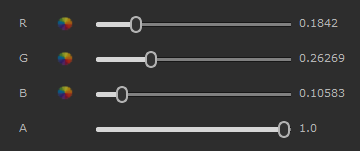
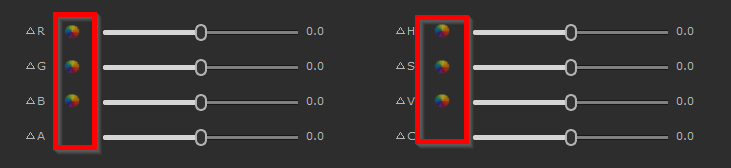
The RGBA Sliders control the values for the Red, Green, Blue and Alpha channel of Keys.
|
|
|
- With a single key selected the RGBA values displayed by the sliders represent the absolute color values.
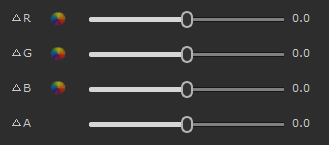
- With multiple keys selected, the sliders are zeroed out and pulling the slider into negative values will subtract the specified value from each key, while pulling it to positive values will add the value
For fine decimal control in a numerical Input field, place your cursor next to the number you want to control, then use the Arrow UP and Arrow Down keys to change the decimal to the right of the cursor.
Example of using Arrow up/down Hotkeys to control the decimal to the right of the cursor:
Sliders have additional control over the value increments a mouse move adds/subtracts. To access the precision ladder, right mouse click on a slider, then drag away from one of the available increments.
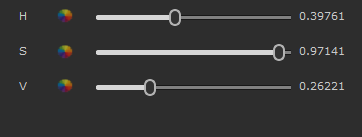
The HSV Sliders control the values for the Hue, Saturation and Value of a selected key.
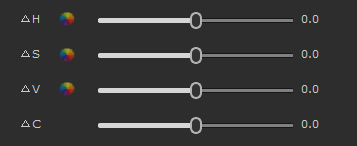
When multiple keys are selected, an additional Contrast slider will become available
- With a single key selected the HSV values displayed by the sliders represent the absolute HSV values of the selected color
- With multiple keys selected, the sliders are zeroed out and pulling the slider into negative values will subtract the specified value from each key, while pulling it to positive values will add the value
When multiple keys are selected, an additional Contrast Slider will be made visible.
The Contrast slider allows you to contrast/decontrast the value of the selected keys, while keeping their hue and saturation the same.
The Contrast midpoint will be dynamically chosen based on the median of the value of all selected keys
For fine decimal control in a numerical Input field, place your cursor next to the number you want to control, then use the Arrow UP and Arrow Down keys to change the decimal to the right of the cursor.
Example of using Arrow up/down Hotkeys to control the decimal to the right of the cursor:
Sliders have additional control over the value increments a mouse move adds/subtracts. To access the precision ladder, right mouse click on a slider, then drag away from one of the available increments.
Next to the RGB and HSV Sliders an additional color control is available.
The control will act differently, depending if only a single key is selected, or multiple keys are selected
With a single key selected ... :
- choosing a color in the color selection popup will replace the current key's color with the new color.
It will act 1:1 the same as choosing a color via the Color Swatch.
With multiple keys selected ... :
- choosing a color will act as a tint for all selected keys. A tint is a multiplier
- when the button you clicked on was next to the RGB Sliders, the chosen color values will be multiplied against the existing key colors.
If you choose a color value (1.0,0.5,0.0,1.0) an existing key with value (0.5,0.5,0.2,1.0) will have the new value (0.5,0.25,0.0,1.0) as a result as each channel apart from the Alpha is multiplied with the chosen values
key_new_RED = key.RED * ChosenColor.RED
key_new_GREEN = key.GREEN * ChosenColor.GREEN
key_new_BLUE = key.BLUE * ChosenColor.BLUE
- When the button you clicked was next to the HSV Sliders, the chosen color will be converted to Hue,Saturation and Value.
The Hue Value is added to each Key's existing Hue Value, while the Saturation and Value is mulltiplied against the keys existing Saturation/Value
key_new_HUE = key.HUE + ChosenColor.HUE
key_new_SAT = key.SAT * ChosenColor.SAT
key_new_VAL = key.VAL * ChosenColor.VAL

Hotkey : C
|
|
Linux only - Black Screen Fix If you encounter a black screen when entering "Pick" Mode, turn on the "Legacy Mode" in the Ramp Editors Colorspace Settings |
The "Pick" Button is only active when a single key is selected and launches a color picker.
You can pick a color anywhere on your screen - even outside of the Mari window.
You can cancel it by pressing the button again, pressing Hotkey C or Hotkey ESC.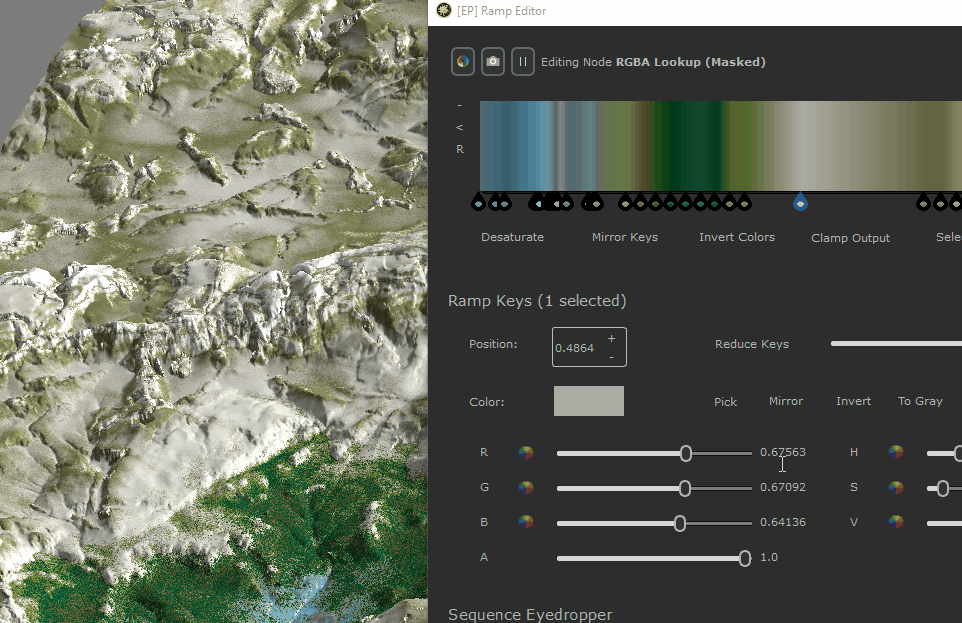
The colorspace you are picking in, is determined by the chosen picking colorspace in the colorspace options of the Ramp editor.
By default the colorspace will be dynamically adopted based on your cursor position:
- When the cursor in within the Mari viewport, colors will be picked "raw" - meaning before any lighting and shading is evaluated. The "raw" colorspace will be auto-determined based on Mari's
internal "Working Colorspace" (e.g. linear, AcesCG etc.) - When the cursor is within the Gradient or Color Swatch of the Ramp Editor, colors are picked in the Gradient Editor's own Working colorspace
- When the cursor in anywhere else on screen, colors will be picked in sRGB

Hotkey : M
The "Mirror" Option shadows the "Mirror Keys" functionality found in the Gradient Global Toolbar, however this one works only on selections.
It will flip the positions of the selected keys, e.g. the far left key's position will assume the position of the key on the far right etc.


The "Invert" Option shadows the "Invert Colors" functionality found in the Gradient Global Toolbar, however this one works only on selections.
"Invert" will convert selected colors in the Gradient to their reversed color. Reversing is done by subtracting the value of each color channel from 1 e.g.
new_red.VALUE = 1.0 - red_channel.VALUE
new_green.VALUE = 1.0 - green_channel..VALUE
new_green.VALUE = 1.0 - green_channel..VALUE
The alpha will never be inverted.
Example of the inverted color of red


The "To Gray" Option shadows the "Desaturate" functionality found in the Gradient Global Toolbar, however this one works only on selections.
It will convert the colors of the selected keys to a grayscale value using a Bt.709 Luminance function.
Hotkey : CTRL + C / CTRL + V
The Copy/Paste Functions allow you to copy the color values of a single selected key, and paste it onto one or multiple other keys.

Hotkey : DEL
Allows you to delete selected keys from the Gradient.
|
4 - Sequence Eyedropper |


Hotkey : SHIFT+C
|
|
Linux only - Black Screen Fix If you encounter a black screen when entering "Eyedropper" Mode, turn on the "Legacy Mode" in the Ramp Editors Colorspace Settings |
The Sequence Eye Dropper is similar to the "Pick" Color Picker, however it allows you to pick a whole range of colors in one go.Each sample point will be converted to one color key (depending on set precision). You can pick anywhere on yor sceen by pressing the "Seq. Eye Dropper" Button, then initializing the picking process with a single click. End the picking process with another click.
You can cancel the picking by pressing the button again, pressing Hotkey C or ESC.
Example of picking a color range from Google Maps within a browser
The colorspace you are picking in, is determined by the chosen picking colorspace in the colorspace options of the Ramp editor.
By default the colorspace will be dynamically adopted based on your cursor position:
- When the cursor in within the Mari viewport, colors will be picked "raw" - meaning before any lighting and shading is evaluated. The "raw" colorspace will be auto-determined based on Mari's
internal "Working Colorspace" (e.g. linear, AcesCG etc.) - When the cursor is within the Gradient or Color Swatch of the Ramp Editor, colors are picked in the Gradient Editor's own Working colorspace
- When the cursor in anywhere else on screen, colors will be picked in sRGB

When using the "Sequence Eye Dropper" by default the result will be normalized to the full range of the Gradient - replacing any existing keys in the Gradient.
The first point of the Sequence Eye Dropper will be position 0, the last one position 1.
Using the "Limit Range" toggle you can change the normalization range to a value other than 0 and 1.
To do this, select a range of keys in the gradient. The result of the Eye Dropper will be inserted inbetween the first and last position of selected keys.
If only one key is selected, the upper/lower range will be auto-generated based on the position of the selected key (e.g. if selected key has a position over 0.5, then it will be the low range, with the high range being position 1.0)

The "Precision" Value determes how many color keys the Sequence Eye Dropper will generate, in relation to how many points were drawn during the Eyedrop process.
"Precision" is a multiplier value e.g.
- When 100 points are drawn during the Eyedrop process, and a precision value of 0.5 is set, 50 color keys will be generated. Every second point will be ignored.
- When 100 points are drawn during the Eyedrop process, and a precision value of 0.25 is set, 25 color keys will be generated. Only every 4th point will be used to generate a color key
|
5 - Top Row |

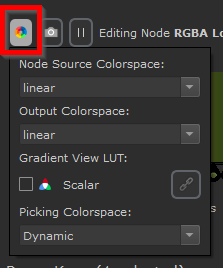
The Colorspace Dropdown allows you to configure different Colorspace and Lookup Table behaviors of the Ramp Editor.
Please refer to the separate Ramp Editor Colorspace topic for detailed information on these settings

Hotkey : CTRL+S
Snapshots are a way to store a quick copy of your current Gradient. This can be useful to store a state you like, before you experiment further.
Instead of later potentially having to do a lot of Undo steps, using the snapshot, you can easily revert back to the previously saved state.
Snapshots can be accessed via the "Project Snapshot" category in the Presets Section of the Dialog. An in-depth topic exists for the Presets, however for simplicity follow the steps below to access a snapshot:
- Click on the "Show Presets" Button or press Hotkey P
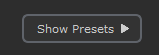
- In the "Category" dropdown ... choose "Project Snapshots"

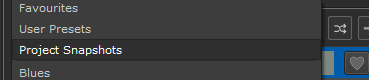
- Double click a saved snapshot to restore it back into the Gradient

|
|
|


Hotkey : SPACE or H
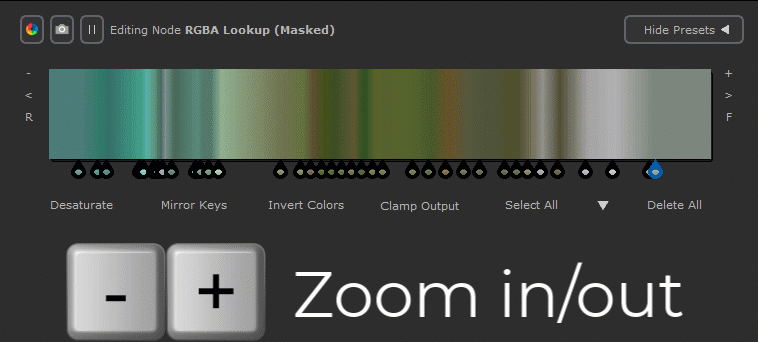
By default any change within the Ramp Editor will be automatically applied to the Node you are editing. If the Node is being viewed, the viewport will update as well.
The node you are editing is the Node that was selected, when the Ramp Editor was launched, and its name is displayed in the top row.
By pressing the "Pause" Button you can temporary suspend the live node update, which can improve UI performance within the Ramp Editor.
Once you resume the live update, the current gradient will be instantly applied to the active node.
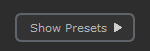
Hotkey : P
Opens/closes the Preset Subsection of the Dialog. The Preset Subsection allows you to save your own Gradient Presets or access a range of out of the box presets that ship with Extension Pack.
For details on the Preset Subsection, refer to the dedicated Help Topic on Presets.
The Presets Section of the Ramp Editor
|
6 - Button Row |


"Commit Changes" will apply the result of the Ramp Editor to the node it is editing (the node that was selected when launching the Editor).
The dialog will be closed.
All changes made within the Gradient Editor will exist as a single undo entry in the Mari history.

"Cancel" will close the dialog and undo any changes (live updates) that were done to the node the ramp editor was editing (the node that was selected when launching the Editor).
|
|
As a result any change you make in your Mari scene while the Dialog is open, will live under this Mari History entry. This includes viewport navigational changes. |

The Gradient Display as well as the Color field in the "Gradient Keys" Section go through a Lookup Table (LUT) to mimic color results in the Mari viewport.
|
|
The Gradient Lookup Tables do not affect internal data. It is only changing the display of color values within the Editor |
The Lookup Table mimics the Color/Scalar Lookups found in the View Transform Toolbar
Mari's View Transform Toolbar
A similar color/scalar toggle as in the View Transform Toolbar can be found in the Right hand corner of the Ramp Editor, allowing you to switch the display of colors in the Editor between color and scalar mode.
Optionally you can double click the toggle to set it to "Scene Link" Mode, where the Setting will automatically switch depending on which state the Mari View Transform Toolbar is in.
Below you can find the Icons representing the different modes
|
|
The Gradient Color Display goes through the Lookup Table chosen in the View Transform Toolbar for "Color" Mode |
|
|
The Gradient Color Display goes through the Lookup Table chosen in the View Transform Toolbar for "Scalar/Raw" Mode (often none or raw) |
|
|
The Gradient Color Display is synced to auto-switch depending in which state the View Transform Toolbar is in. |
|
|
The Gradient Color Display is synced to auto-switch depending in which state the View Transform Toolbar is in. |
For details on Colorspace and Lookup Tables refer to the Ramp Editor Colorspace Section.
|
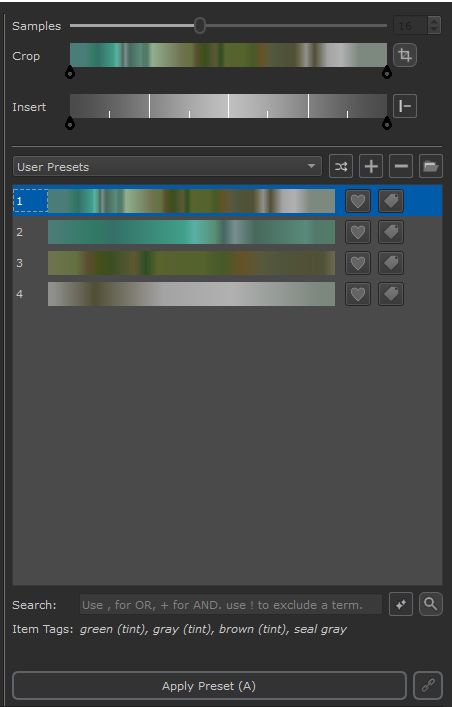
7 - Presets |
Hotkey : P
The preset subsection of the dialog can be opened with the "Show Presets" Button found at the top right corner of the dialog.
Preset Subsection allows you to save your own Gradient Presets or access a range of out of the box presets that ship with Ramp Editor.
For details on the Preset Subsection, refer to the dedicated Help Topic on Presets.
The Presets Section of the Ramp Editor
|
8 - Help / Info Line |


The bottom row of the dialog display random Quick Tips as well as Tool specific warnings and Information.
To cycle through the available Quicktips, click on the Quicktip line or press Hotkey F1.
Below you can find all currently available quicktips:
- The editor supports Brightness Lookups, Color & RGBA Lookups and Gradient Map Nodes
- Press Hotkey "Space" or "H" to toggle the auto-node update
- Press Hotkey "P" to toggle the preset editor open/closed
- Click on this line or press Hotkey "F1" for the next Quicktip
- You can apply presets in the preset editor with Hotkey "A" or Dbl. click
- You can activate auto-apply presets in the preset editor with Hotkey "ALT+A"
- Drag below the Gradient to select multiple handles. Hold SHIFT to add, CTRL to remove
- Use the powerful Eye Dropper Option to sample a gradient anywhere on your screen
- Use "Limit Range" to insert Eyedropper results in a range by selecting 2 or more Keys first
- Save and recall Gradients easily using the Preset Editor
- Saved Presets can be cropped using the Crop Tool, to limit their range
- Presets can be added to the Favourite Category via the Heart Button or hotkey "L"
- Presets can be tagged for easier searching
- Use Hotkey "L" in the Preset Editor to quickly favourite/unfavourite an item
- Presets are auto-tagged with color names that appear in the gradient
- You can turn the Preset Cropping on/off via Hotkey "ALT+C"
- Select a random Preset in the current Category via Hotkey "S"
- Toggle the Filtering in the Preset Editor on/off via Hotkey "ALT+F"
- Many items have tooltips with Explanations and their Hotkeys
- Click on this line or press Hotkey "F1" for the next Quicktip
- Changes are only commited to the active node when pressing "Commit Changes"
- You can zoom into the gradient with the hotkeys "+" or "-".
- Pan inside a zoomed in gradient using the "Arrow Left" or "Arrow Right" Keys
- To reset the zoom on a Gradient, press Hotkey "R"
- To zoom in and frame on selected Keys, press Hotkey "F"
- When zooming in and out of the gradient, selected keys are the zoom center
- Hold Hotkey "Q" in the Gradient and move your mouse to scale keys up and down
- Hold Hotkey "D" in the Gradient and move your mouse to distribute (all,selected) keys
- Hold Hotkey "U" in the Gradient and move your mouse to duplicate selected keys
- Use the Hotkeys "CTRL+A" to select all Keys, "CTRL+D" to unselect all or "CTRL+I" to invert
- Mirror Keys in the top row will mirror all keys, mirror in the Ramp Keys only selected
- Limit the Range, Presets are inserted into in the Gradient via the "Insert" Option.
- "Reduce Keys" intelligently removes color keys that contribute less to the overall result
- You can pause the automatic Viewport update with the Hotkey Space or H.
- You can configure your colorspace settings via the icon next to the node name (top left)
- Double-click the Color/Scalar Button (bottom right) to link it to the Viewport
- The Editor stores up to 200 Undo Steps. Use CTRl+Z and CTRL+Y to undo/redo
- To go from a multi key selection to a single key selection you can double-click a key.
- Using the UP/DOWN Keys in a numerical field will adjust decimals based on cursor position
- Right click on a slider, to access the increment ladder - mouse drag away from a button to use.
- Store a snapshot of the current gradient with CTRL+S to Presets/Project Snapshots.
- The additional Contrast Slider appears in the UI when multiple keys are selected.
- Quickly mirror selected keys using Hotkey "M"

By default the Ramp Editor dialog will stay on top of any other window, even if you click outside of it.
By clicking the Pin Button you can change this to no longer force the "Stay on top" behavior