|
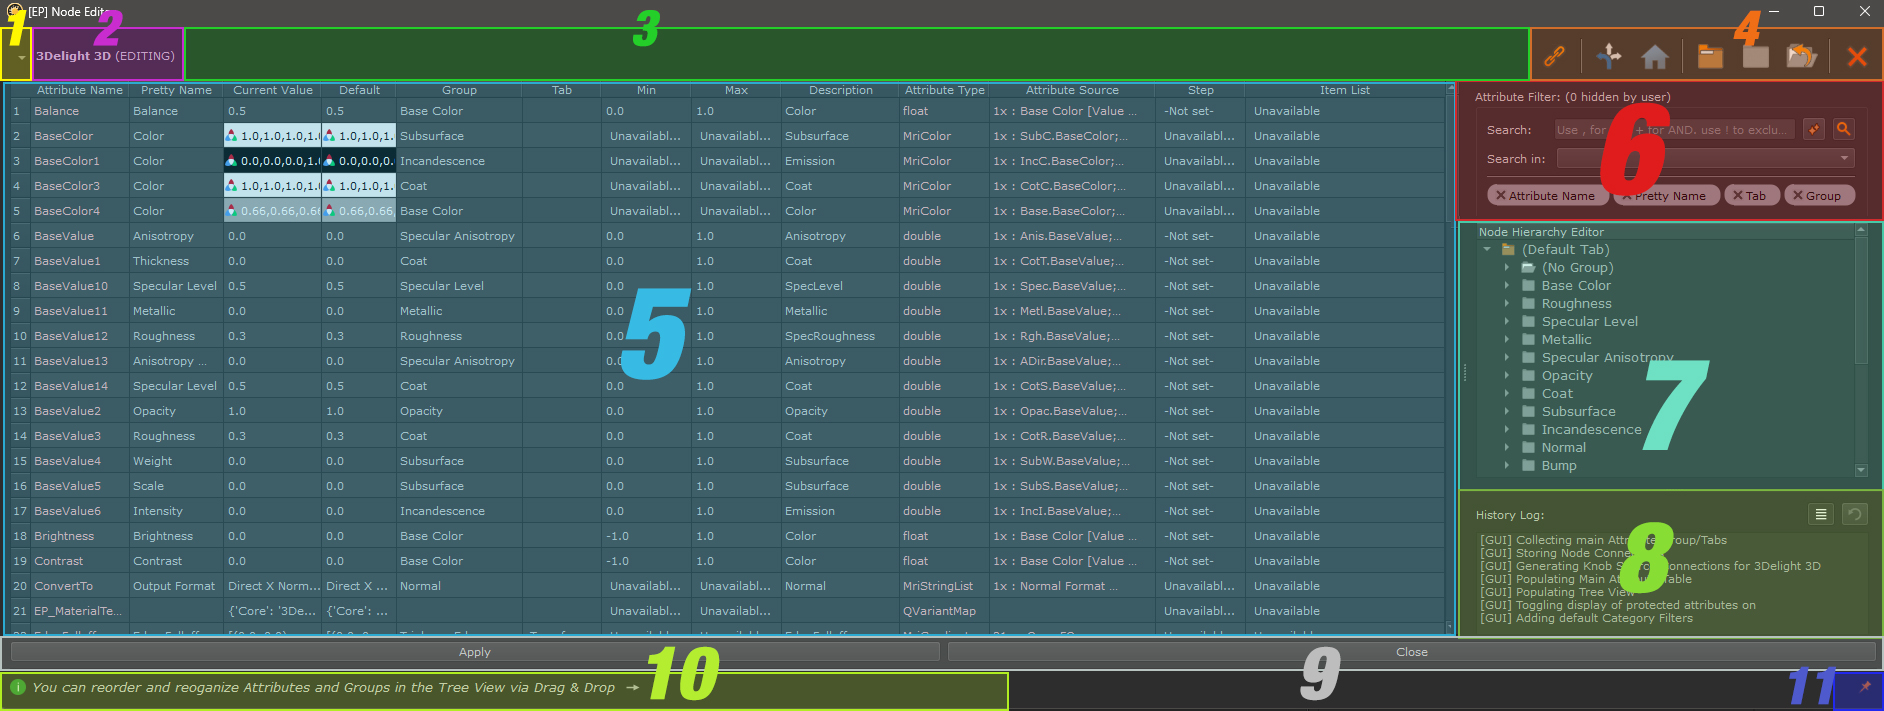
UI Overview |
|
|
Many Items have Tooltips. If you are unsure what a UI Part does, hover your cursor over it for more information |
The Node Editor User Interface can be customized to your liking.
- The Node Editor opens in a way that you can continue to interact with the Mari Main Window
- By default the Node Editor will open at a size that is best suitable for the Node you are editing, however if you choose to scale up the window, this scale will become the new default.
To reset the Dialog Size to its default "dynamic" sizing, scale the window down to its minimum width and height again. - Use the Horizontal and vertical Splitters to adjust the Elements Splits

- You can reorder the Table Columns by dragging their headers. The order of Columns is saved and restored the next time you open the dialog
- You can make columns wider or narrower by dragging the column header borders
- By default the window is set to "Stay on Top" of other windows (e.g. the Mari Main Window). This can be adjusted by clicking the "Pin" Icon in the lower right corner of the Dialog


Show Protected Attributes
Some Nodes have hidden Attributes that are used by Mari or Mari Extension Pack to store additional Data.
This may for example be the Shader Model associated to a Material.
By default these System Attributes are hidden in the Table View, to prevent accidental modification.
By activating the Checkbox, found hidden in the Menu to the left of the Node name, you can make those protected attributes visible again in the Table.
Highlight Changes
"Highlight Changes" when turned on will display a yellow outline around cells that have been changed since the last time the changes were applied
Displays the name of the Node you are currently editing.
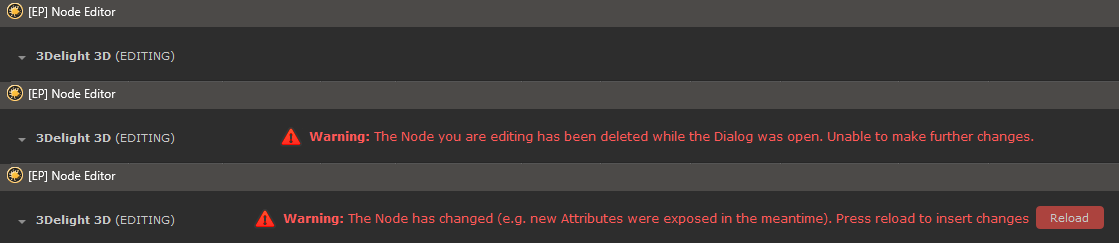
The Warning Line is usually empty, however additional information might get displayed there if
- The node you are editing was removed from your scene
- The node you are editing has changed by removing or adding attributes from within the scene

The Tree View Buttons allow you to interact with Selections within the hierarchical Tree View on the right side of the Dialog.
- Link Attributes

The "Link Attributes" Button is a special one, as it does not require a selection within the Tree View.
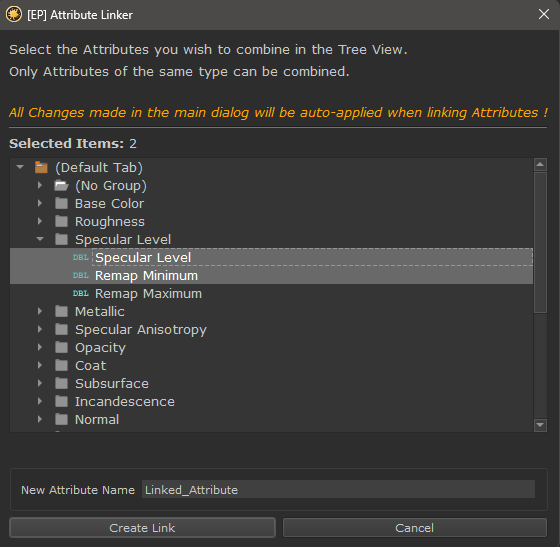
It opens a separate dialog where you can choose Attributes you want to combine into a single, new attribute that controls
all selected ones.
|
|
|
Linking Attributes is useful to for example control the UV tiling of multiple images (e.g. Color, Displacement etc.) with a single attribute, instead of having separate
Controls for each.
The "Link Attributes" Dialog
- Jump to Source ... (Node Properties or Node)

The "Jump to Source" Button is a Double-Action button, that executes different functionality depending on if you single click or double-click on the button.
It allows you to jump to the Source Node or Source Node Properties of the Attribute, that is currently selected in the Tree View.
The Source Node is the Node that exposed the Attribute to the Parent Node (e.g. Material, Custom Procedural or Group Node).
The Source Nodes of any Attribute are listed in the "Attribute Source" Column of the Table View
Example of the Source Node ("Base Color [Value Adjust]") and Source Attribute ("Balance")
of an exposed Attribute
- To open the Source Node's Node properties, perform a single click on the Button or press the Hotkey ALT+A
- To jump your Nodegraph Palette View to the Source Node and open its Node Properties, double-click on the Button or press the Hotkey ALT+F
- Jump Home ... (Node Properties or Node)

The "Jump Home" Button is a Double-Action button, that executes different functionality depending on if you single click or double-click on the button.
It allows you to reopen the Node Properties of the Node you are currently editing, or reframe it in the Nodegraph.
This is useful if you used "Jump to Source .." and wish to return to the Node you are editing
- To open the Node's Node properties, perform a single click on the Button or press the Hotkey ALT+H or CTRL+H
- To jump your Nodegraph Palette View to the Node and open its Node Properties, double-click on the Button or press the Hotkey H
Example of using "Jump to ..." and "Jump to Home"
- Add new Tab

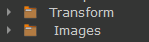
Adds an empty new Tab to the Tree View. Tabs can be useful to further refine Node User Interfaces, by only having thematically related Attributes inside a Tab (e.g. "Transformation Controls").
Tabs added via the "Add new Tab" Button, will not be deleted even if empty. This differes in behavior from Tabs created via the Table View or Tabs that existed when the Node Editor opened.
Hotkey: T
|
|
|
- Add new Group

Adds an empty new Group to the Tree View.
Groups added via the "Add new Group" Button, will not be deleted even if empty. This differes in behavior from Groups created via the Table View or Groups that existed when the Node Editor opened.
Hotkey: G
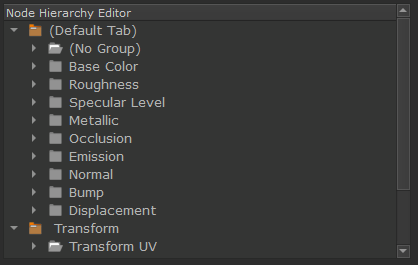
- Group Open/Collapsed State

The "Toggle Group State" Button works on selected Groups in the Tree View. By default any group in the Node Properties of a Node will be open, when the Properties are loaded.
Using the Button you can toggle Groups to be closed by default.
Hotkey: O
You can see the current state of a Group by the difference in Group Icons. Below the Base Color Group will be expanded by default, while the Roughness Group will be collapsed.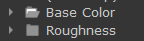

- Delete Tab/Group/Attribute

When an empty Tab or Group is selected, pressing the Button will remove the Tab or Group.
If an Attribute is selected instead, the Attribute will be deleted, unless it is a linked Attribute that has connections to multiple other Attributes.
In this case a dialog will ask you what connection you want to delete, or delete all
Any Node that is selected in an open Nodegraph is auto-selected in this dialog and listed at the top.
This can help, if you have many links to a single attribute and are unsure what attribute exactly you need to remove.
In this case locate and select the node in your Group Node Subgraph, where you want to remove a connection. Then open the "Delete Attribute" Dialog above.
|
|
|

The Attribute Table is the heart of the Node Editor, allowing you to modify many different parameters of your exposed Attributes.
The Attribute Table is covered in-depth in the separate "Attribute Table" chapter, however for completion some workflow hints are listed below:
- Column Order and Size can be adjusted by dragging the column headers (re-ordering) or their edges (resizing)
- Cells marked in red or containing "Unavailable" in their text, are read only fields. All other cells can be edited via a double click.
- Clicking in a cell in the columns "Pretty Name", "Description", "Group" or "Tab" will auto-sync the selection to the Tree View
- While other columns are not synced to the Tree View automatically, you can always press the Hotkey S, to force sync the selection to the Tree View
- Cells have content specific Right Mouse Click Menus. Below you can see the Context Menu of a Color Attribute, when launched out of the "Current Value" Column


The Attribute Filter can be used to filter and hide Attributes in the Table View.
- Search

Use the Text Field to enter your word searches. As in other Extension Pack Filter Fields, you can use several Operators to fine tune your search.
Searches are case-insensitive meaning "SpeCuLar" would be treated as "specular".
Filtering Operators are
- Comma (,)____________
Separate multiple search terms or search term operators via a comma. If any of the terms is found the row in the Table will be displayed
e.g.: specular,color,subsurface will display any attribute row that has specular, color or subsurface in any of the searched columns
- Plus (+)_____________
The Plus (+) operator stipulates a combination of terms that are required to be a filter match
e.g.: specular+color will display any attribute row that has both specular and color in its searched columns
- Exclamation Mark (!)_____________
The Exclamation Mark (!) operator excludes a search term
e.g.:
- Search String "Specular" will return any Attribute Row containing "Specular", such as "Specular Roughness", "Specular Color" etc.
- Search String 'Specular+!Color' will return only rows that contain "Specular" but not contain "Color"
You can combine operators freely e.g. Specular+Color+!ClearCoat,Roughness will display any row that has
- Both "Specular" and "Color" in the searched Columns, but not "ClearCoat"
- or has Roughness in the searched Columns
- Clear Search

The "Clear Search" Button will reset the Search Field to be empty
- Toggle Search on/off


Hotkey: F
The "Toggle Search" Button allows you to disable the Search without clearing your Search Terms from the Text Field.
- Search in ..

The "Search in .." dropdown and the Tags below it, determine which Columns of the Table View the search is performed in.
The visible Tags are the active Columns to Search.
To add additional Tags, choose them from the dropdown. To remove a Tag, click on the Tag Button itself.
If there are no tags at all selected, all columns will be searched.
If the "Any" tag is added, all other tags are ignored and all columns will be searched as well.
The Tree View is the Hierarchy Representation of the Node's Attributes, as they will be listed in the Node Properties palette.
We cover the Tree View in a dedicated chapter, however for completion here are some tips how to work with it:
- You can rename a Tab, Group or Attribute by double-clicking on it.
- Removing the Name of a Group will add its Attributes to the "No Group" container
- Removing the Name of a Tab will add its Groups and Attributes to the "Default Tab"
- Clicking on an Attribute will frame it in the Table View
- You can use drag & drop to move Groups - either within a Tab to change the order or across Tabs
- You can use drag & drop to move Attributes
- You can use the buttons above the Tree view to create new, empty Tabs and Groups.
- Youc an use the "Toggle Group Open/Close" Button above the Tree view, to set a selected Group to be open or closed by default in the Node's Properties

The History Log serves a double function of recording Undo Entries from the Table View, as well as showing relevant event entries from the UI.
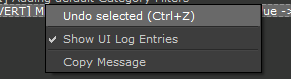
- Undo (Ctrl+Z)
Whenever an Attribute Value in the Table View changes, an Undo Entry will be generated. Undo entries can be distinguished by their [UNDO] Prefix or [REVERT] prefix (if it's the result of an undo operation)

The Undo system is non-linear, meaning you can select any Undo Entry, even if it isn't the last one in the list, and undo just the selected step.
You can undo using one of the methods below - Hotkey Ctrl+Z
- The Undo Button over the Log

- by right Mouse clicking on an Undo Entry
- Log Messages
The History Log also is the place where more or less important messages will be displayed. Messages can range from simple UI Process Messages to Information Messages all the way to reports about a critical Dialog Error.
Less important UI messages are usually hidden but can be displayed via the "UI Messages" Button above the History Log or the Right Mouse Click Context Menu.
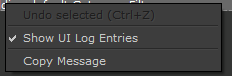
Selected Items in the Log Entries can be copied to the Operating System's Clipboard via the "Copy Message" option in the Context menu.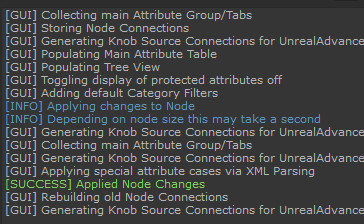
- Apply
Changes made to Node Attributes will be applied to the Node you are editing. The dialog will remain open, allowing you further edits.
In addition, on apply, dialog settings will be stored such as its size, position of splitters, column order etc.
Hotkey: 1
- Close
Closes the Node Editor Dialog. Dialog settings will be stored such as its size, position of splitters, column order etc.
The Quicktips Section of the dialog gives random Hints to help you learn more about some of the dialog's (sometimes hidden) functions.
You can cycle through all available Quicktips by
- Clicking on the Quicktip
- Pressing Hotkey F1
Cycle through the Quicktips by clicking on them or pressing F1
Below you can find a number of the Quicktips for easy reading:
- You can rename Tabs, Groups and Attributes in the Tree View via double-click
- Clicking in the Pretty Name, Description, Group or Tab Column in the Table View, will frame the item in the Tree View
- You can add empty Tabs and Groups via the Buttons above the Tree View or by editing the Group & Tab Column fields in the Table
- Groups and tabs created via the Buttons above the Tree View will not be auto deleted when empty
- You can reorder and reoganize Attributes and Groups in the Tree View via Drag & Drop
- Leaving the Group or Tab Name empty will add children to the default tab or group
- To delete an Attribute, Tab or Group use the delete Button ("X") above the Tree View
- Mari auto-orders Node Tabs alphabetically. You can work around this by adding spaces in front of tab names
- Right-mouse click on a "Current Value" Field to push current values as new defaults, sync values to scene etc.
- Right Mouse Click on a Color Swatch in the table to copy/paste color values, or access defaults (white,black,grey,transparent)
- The "Jump to Home" Button (Home Icon) has two functionalities: Single Click loads the Group nodes Node Properties (CTRL+H), double-click (H) jumps to the Node)
- Simply click on this line (or use F1 Shortcut) for the next handy quick tip
- You can reorder columns of the Table by clicking and dragging the headers.Column sorting and size is saved and restored.)
- The "Jump to Source Node" Button has two functionalities: Single Click (ALT+A) loads the source nodes Node Properties, double-click (ALT+F) jumps to the Node)
- Toggle Node Groups to be closed by default in the Node Properties, by selecting them in the Tree View and pressing the "Toggle Group" Button or simply press hotkey "O")
- Tooltips to the rescue ! No idea what a button does or want to know its hotkey-assignment ? Check the tooltip !
- Dialog Dimensions are saved between sessions. To revert back to "auto-size" scale the dialog to its minimum width/height
- The Mari Main Window stays interactive while the dialog is open, allowing you to continue exposing attributes via Node Properties
- Press Hotkey "S" to force sync the selection of a Table Value Cell to the Tree View
- With a table cell selected, press Hotkey "Enter" or "Return" to start editing. Pressing the hotkey again, completes the edit.
- The Main "Apply" Button of the Dialog can be triggered with Hotkey "1".
- Right-mouse click on a value field (e.g."Current Value" etc) for value specific options
- Remove the minimum and maximum range on a value field by right clicking on the min/max field and choosing "Remove Min/Max"
- By default some internal metadata/attribute names are hidden in the Table. You can unhide them via the small arrow next to the node name
- Use the Attribute Filters to filter your Table. To search for empty Groups enter "No Group", to search for default Tab enter "Default Tab"
- The Undo Stack can work non-linearly. You can undo items from the middle of the list by selecting a row and using the Undo Button, Right Mouse Click Undo Option or CTRL+Z
- Use the "Pin" Button on the lower far right corner of the dialog to pin the dialog on top of other windows or disable that behavior
- Opening the Node Editor with more than one node selected, opens the Dialog in "Compare" Mode.
- Use "Item List" Nodes to create Nodes with Dropdowns, then edit the Dropdowns via the "Item List" Column of this dialog
The Node Editor does not block you from interacting with other Mari Tools and the Mari main Window.
The "Stay on Top" toggle in the lower right corner of the Dialog determines if the Node Editor window will always stay on top of other Dialogs, no matter if it has focus or not.
If off, the dialog will be hidden behind other Windows if the cursor clicked outside of the Editor Window.